It’s Pedicure Time, Girls! – An Update on the Goat Hooves
by Rose
This post is a follow-up to a prior post I wrote on 11/14/2011, “Goat Hooves (The Newest Challenge)”. The pictures and video provided below are to show all of our friends, family and fellow goat lovers, we have finally “figured” out hoof trimming and our girls now have beautiful pedicures, after many hours and several days of intensive and careful trimming.
I also want to thank Logan and Pam, from thegoatspot.net, for their support and encouragement. I don’t think we would have had as much courage to undertake this endeavor without them. Also many thanks to Tamara, my dear friend from Montana, who had her horse farrier friend, give us detailed advice as well. (And to everyone else who emailed us or left us a uplifiting comment!)
I only documented several of our girls hooves here, but all of our other goats we had just purchased, had similar overgrown hooves.
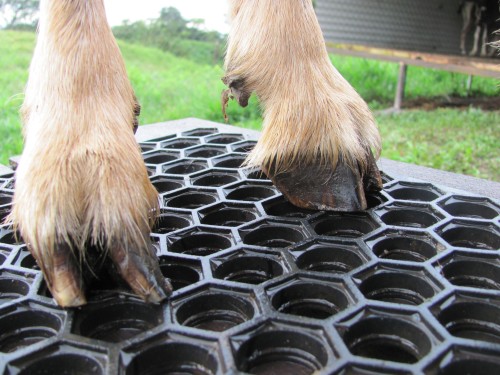
Marilynn getting her Pedicure
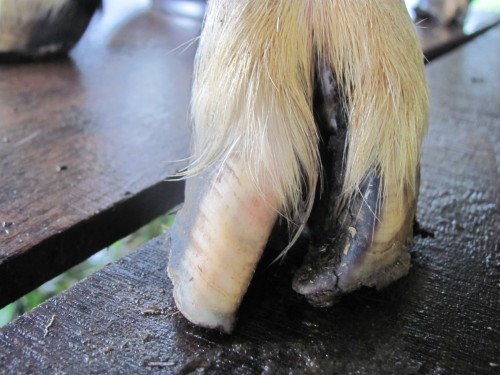
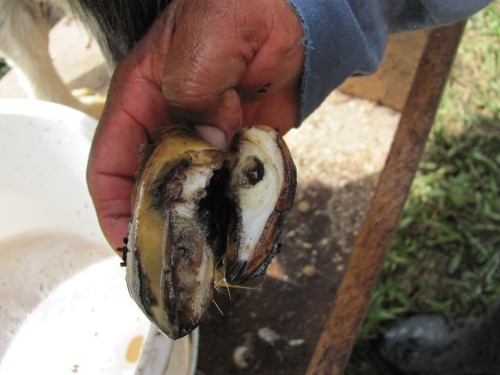
Marilynns hooves and soles were the worst of all of our girls. She was just lying on the grass in the mornings-laid out flat, not wanting to get up and limping very badly, when she did get up to walk. We started with her hooves first because my thought was- she is practically lame now, I suppose we cannot make her hurt any worse. Her soles were a grey colored swiss cheese looking, all dead tissue and had a foul odor. She also had pockets in her hoof walls. We started her on an antibiotic and anti-inflammatory injections because I suspected hoof rot. The day after we trimmed her hooves, she was already up and walking around better, much better than she had been. I was encouraged. A week later, we trimmed her again. Today, she is up and walking without any signs of pain or difficulty.
Marilynns Front Left Hoof Before
Marilynns Front Left Hoof After
Marilynns Back Left Hoof Before
Marilynns Back Left Hoof After
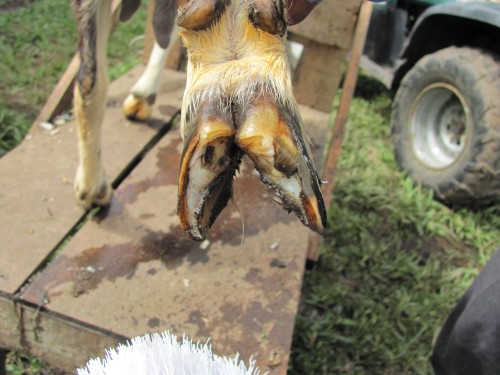
Gertrudes Back Right Hoof Before
Gertrude Getting Her Pedicure of the Right Back Hoof
Gertrudes Left Front Hoof Before
Gertrudes Right Front Hoof Before
Gertrudes Right Front Hoof During Trimming
Gertrudes Right Front Hoof Almost Done (You can also see a peek of the finished Left Hoof)
Violas Back Hooves Before
Violas Back Hooves After
Our Procedure for Hoof Trimming:
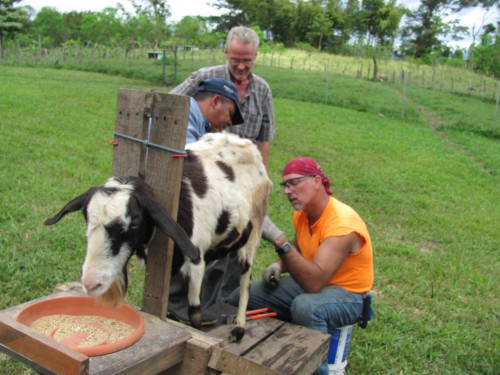
1. The goat was secured on the milk stanchion and given a little food, to keep her occupied and relaxed. (Though the first time we trimmed Marilynn she finally had to be laid on the ground to be trimmed because she did not want to stand. It took two people to hold her down and a third person to trim her hooves. She is a big strong girl!)
2. The bottoms and the outsides of the hooves were then soaked and washed with a stiff scrub brush, in warm soapy water that had a splash of bleach in it. This helped to remove the majority of poo and dirt and let us see the little growth lines that circle the outside of the hoof, so we could use them as a guide when we began to cut.
3. We began trimming any of the outer hoof wall that was ovegrown over the sole, starting at the toe and working our way back to the heel, so that it was even with the sole. We then did this same procedure to the other toe. (We used “hoof rot shears” at this step. We also wore gloves to have a better grip when using the shears and goats leg.)
4. We then used an Exacto knife to cut back any dead overgrown sole and heel, starting at the toe and cutting back toward the heel. We followed the growth lines that circle parallel with the hair at the top of the hoof, to get the hoof trimmed to the to correct angle. You want to have the sole and heel trimmed flat and even. We trimmed off thin slices at a time. We were careful to stop when we saw any pink, because to go further would have caused the sole to bleed. It is recommended to have a “Blood Stop” powder or cornstarch to apply to use if you cause the goat to bleed.
5. Some of the goats had dirty pockets and some had hoof walls that were separating from the sole. We carefully used the Exacto knife to cut away any of these kinds of areas, so there would be no dirt or poo, etc… which could collect in these crevices and potentially cause hoof rot.
6. When we were finished trimming, we let the goat stand on her hoof and assessed her balance, to make sure we had gotten her hoof level and flat. We then applied a formaldehyde/copper solution to the goats hooves, as recommended by our veterinarian.
(A few notes: We used the hoof rot shears/nippers and Exacto knife because that is all we can find for hoove trimming here in Panama… One day I would like to be able to obtain one of those fancy looking goat shears that look like garden shears from the states… Also some of our girls are going to need to be trimmed every week, until we get their hooves, as normal as we can. )
Here is a list of on-line links we found helpful as references:
http://www.ahp-vet.com/healthysmrm/C322.htm
http://www.boergoatshome.com/hooves.php
http://www.boergoats.com/clean/articleads.php?art=80
http://www.gorge-usboergoats.com/hoof_trimming.htm
http://www.tennesseemeatgoats.com/articles2/hoofrot,hoofscald06.html
Well, this is what we were up to all week, giving up our full-time jobs to work in the beauty salon and give pedicures… to goats!!!!
What have you all been doing??? (Send me a note and share with me, would love to hear from you!) I have been thinking about you and pray you are doing well. You are in my thoughts and prayers.
Much love, Rose
P.S. Here is Miss Marilynn sitting on the trailer of the ATV-wondering to herself “Why walk and mess up my new pedicure, when I can ride?”
She really wanted burgundy nail polish, but all we had was pink left.
What’s a goat to do?






Hi–looks like u hae all undercontrol—we are fine just busy—funeral at church today for Justin & Ashley Cheatwood baby–5 mos and lived 2 days—this is Jimmy oldest son—-still going school often—-had good trip to Ark for Thanksgiving—-return Sat 11-26—-have girls tonite while Jason & Jenn christmas shop for them—hope Lee is doing better—on prayer list—finally got inch of rain—80 & sun mon and tue–hope we get it—-Daryl follows your post he told me tonite ph call–his b/d is 12-9-11—he says it is interesting to keep up w/how u doing there—Brenda in NM–her mom will have breast cancer surgery Mon 12-5—-otherwise all same just worse—-we made 140 care caps 12-1-11–1355 for this year—-tell all hello and we ok—-take care and keep squeezing them tits!!!!!!!!!!!!!!!!!
Thanks Dad for stopping by and letting us know how you are doing. Miss you and love you all. Thank you for your prayers for Lee. We will keep Brendas mom in prayer. And dont worry, I am gonna keep squeezing all the tits I can get a hold of!!!!!!!!!!!!!!!!! (I got that under control.)
Excellent goat report! I am SO glad it is you and not me there… I could NOT handle it 🙂
I love reading about all your adventures in Panama.
Much love to all.
LOL. Thank you for the A plus on my goat report… (I did get an A plus, didn’t I? Excellent=A plus…?)
It has a lot of pluses here girl, but there are the challenges as well- on the farm and living in Panama. Yet we still love it very much!
I am glad you enjoy reading about our adventures. I enjoy writing about them. It lets me unwind in the evenings.
Keep square dancing lady and do an extra docie-do for me! I would love to be able to do that here, but I am sure that is non-existent here. The few times, I tried square dancing everyone so nice and it was always so much fun.
We love you back and so good to hear from you. You two take care of each other, ok?
YES, you get an A+ indeed!
Headed to WA this weekend… will spread some kisses and hugs around. Won’t get to see everyone on this trip, but will think of you and yours too!
*smooch*